Powered by Blogger.

Wednesday, 28 December 2016

How to create a form using html


HTML forms are the main important point of interaction/communication between end user and website or application.HTML forms are used to send data to the website HTML forms accept data from user and sent to website or database.
Lets start:

The <form> element:

All HTML forms are starts with a <form> element and ends with </form>.

The <input>, <label> and <textarea> elements

The <input> element allow user to put data from the user, <label> element defines the input element and <textarea> element allow user to type comment/message from user.

Code is something like this

The radio button input:

The radio button input allow user to select ONE of limited number of choice. radio button input is created by <input> element but NOTE that by changing input type you can change the type of input whether it is text type, input type , password type or submit type.

Code is something like this   


If any query please leave a comment I will back to you as soon as possible.

Monday, 26 December 2016

How to make list using HTML


Lists are used to group some related information together you can use ordered list or unrecorded lists as your requirement. lets start to learn how we make list using HTML.
For unrecorded list:
<ul>
 <li>List Item One </li>
 <li>List Item two</li>
 <li>List Item Three</li>
 <li>List Item Four </li>
 <li>List Item Five </li>
 .....
</ul> 

For orecorded list:
<ol>
 <li>List Item One </li>
 <li>List Item two</li>
 <li>List Item Three</li>
 <li>List Item Four </li>
 <li>List Item Five </li>
 .....
</ol> 

Output:
If any query please leave a comment I will back to you soon:

Sunday, 25 December 2016

Creating Links to Other Pages using HTML


Today you will learn how to link other pages using HTML tag. It is very simple once you will learn links you can make many links as you want.
Let's start 
HTML provide us anchor tag to link one page, image ,any word or a single alphabet to another pages.
Example: The code bellow create a link to the W3 Learning House home page.
<a href="w3learninghouse.blogspot.com">W3 Learning House</a> 
W3 Learning House

Friday, 16 December 2016

How to insert image to HTML webpage


Step #1. Add image tag in to your web page <img>

In your web page you will add html image tag like this <img src = "path to image " alt="alternate image name "> . Note that the extension .jpg , .png , .svg with your image name.

Click the image bellow to see full view

Step #2. Changing the size of the image

You will change the size of image using CSS properties within HTML document and also a operate style sheet file. for know we will use use CSS properties with in HTML document. 

Properties like this style="width: 60px; height: 60px;" you are free to set the size of image by changing the number in pixels.   

Click the image bellow to see full view  


Please leave a comment if any query : Than you

Thursday, 15 December 2016

How to make a website using html code


Step #1. Open Notepad or Sublime Text

Notepad is free and automatically installed in your computer just go to start menu and open notepad or if you are using sublime text (is also text editor like notepad with advanced features) open your sublime text.

 Click the image bellow to see full view

This is the notepad view you can write your html using notepad

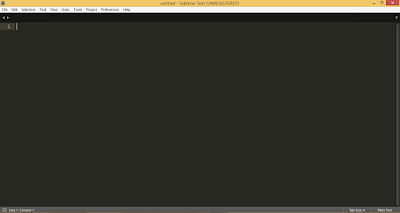
This is the sublime text view you can also write your html using sublime text


Step #2. Save the document with .html extension

Note that you need to save the document with .html extension you are free to select any name like (e.g web.html , index.html , home.html , about.html ) 

 Click the image bellow to see full view

Click on the file menu and the select "save as" and give a name for your html document.


Step #3. Start writing HTML code (The basic layout)

You will start your HTML coding with html tag <html> and must end with </html> in between <html> </html> you will write title <title>example title</title> and after title you will write <head></head> and then <body></body> this is the basic HTML layout. in between <body></body> you will write your code. Also see the image bellow to see the actual layout setup.

Click the image bellow to see full view

This image show you the clear concept of the basic html layout.


Step #4. Save HTML code (ctrl+s)

Follow the above steps and save your HTML document by pressing (ctrl+s) or go to file menu and click on save option. after saving you will open the document in any web browser it show the out put.

Click the image bellow to see full view


Lease a comment if any query. Thank you